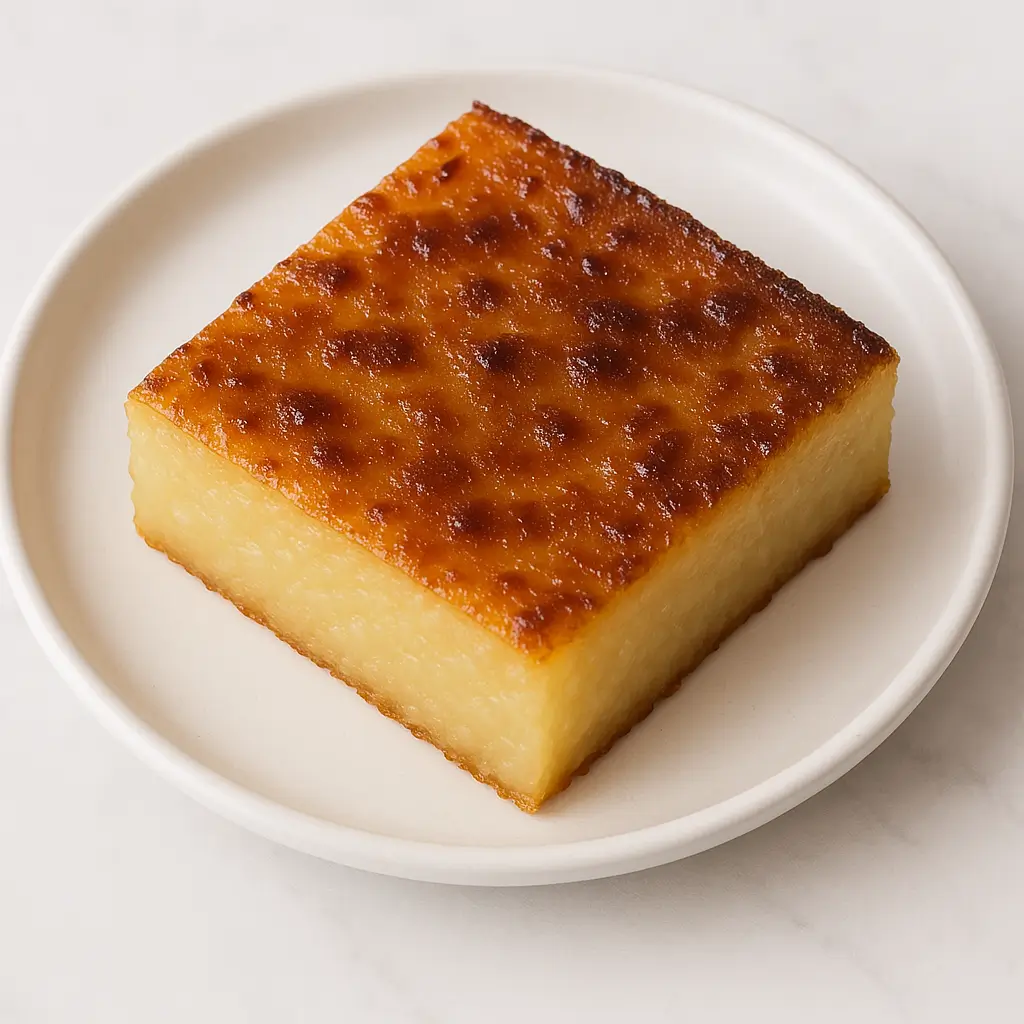
Easy Cassava Cake Recipe That Stays Soft!
Cassava cake is a beloved Filipino dessert that is soft, chewy, and delicious. This traditional treat is made from grated cassava, coconut milk, and eggs. Unlike other cassava cakes, this recipe stays soft even the next day, making it a perfect dessert for any occasion.
- Cassava cake stays soft even after a day.
- Gluten-free and made with simple ingredients.
- Easy to bake with minimal preparation time.
What Is Cassava Cake?
Cassava cake, also called cassava bibingka, is a classic Filipino dessert. It is commonly served during holidays like Christmas and New Year. This cake can be eaten warm or cold and is often topped with sweet condensed milk or custard.
Why You Will Love This Recipe
- Not too sweet – This version uses less sugar and condensed milk.
- Soft and moist texture – It does not harden like other cassava cakes.
- Easy to prepare – Just mix all ingredients in a bowl and bake.
- Naturally gluten-free – No flour is required.
Cassava Cake Ingredients
Here are the ingredients you will need:
- Cassava – Use fresh cassava root or pre-grated frozen cassava.
- Whole Eggs – Helps the cake hold its shape.
- Coconut Milk – Adds a rich, creamy taste.
- Evaporated Milk – Gives a soft, cake-like texture.
- Condensed Milk – Provides sweetness.
- Sugar – White or brown sugar works well.
- Salt – Balances the flavors.
- Melted Butter – Keeps the cake moist.
How to Make Cassava Cake
1. Prepare the Batter
- Mix all ingredients except the grated cassava in a bowl.
- Taste the batter and adjust the sugar as needed.
- Add the grated cassava and mix well.
2. Bake the Cake
- Preheat oven to 350°F (175°C).
- Pour the mixture into a greased baking pan.
- Bake for 45 minutes to 1 hour until fully set.
3. Add the Topping and Broil
- Pour the condensed milk or custard topping over the cake.
- Broil until the top turns golden brown.
Best Baking Pans for Cassava Cake
Choose a rectangular or square pan for even baking. Here are the recommended sizes:
| Shape | Size (in inches) |
|---|---|
| Square | 9×9, 10×10 |
| Rectangular | 11×7, 12×7, 13×9 |
If using smaller pans, divide the batter between two pans.
Cassava Cake Topping Options
1. Condensed Milk Topping
- Simple and delicious.
- Just pour condensed milk over the cake and broil.
2. Custard Topping
- Made from coconut milk, condensed milk, and egg.
- Takes 20 minutes to bake until golden.
Optional Add-Ins
- Grated Cheese – Adds a savory balance.
- Young Coconut Strips – Enhances texture.
- Sweetened Macapuno – A delicious coconut-based addition.
How to Serve Cassava Cake
- Let it cool before slicing.
- Serve warm or chilled.
- Top with cheese or coconut strips.
- Enjoy as a dessert or afternoon snack with Filipino dishes like pancit bihon and Filipino spaghetti.
Storage and Shelf Life
- Store in an airtight container in the fridge for 3 to 4 days.
- Freezing is not recommended as it affects the texture.
Reheating Tips
- Microwave for 20-30 seconds.
- Heat in the oven at 200°F (100°C) until warm.
What Is Cassava?
Cassava, known as kamoteng kahoy in Filipino, is a starchy root vegetable. It has a mild, nutty flavor and a texture similar to potatoes when cooked. Tapioca flour is made from cassava and is widely used in gluten-free baking.
How to Prepare Fresh Cassava Root
- Cut the cassava into small sections.
- Peel off the thick outer skin.
- Wash the cassava and soak for 20 minutes.
- Grate using a food processor or hand grater.
Frequently Asked Questions
Do I need to squeeze out liquid from cassava?
Frozen cassava should be drained but not squeezed.
Can I use cassava flour or tapioca starch?
This recipe has not been tested with cassava flour.
Why does cassava cake become hard?
It needs enough fat (butter) and liquid (coconut milk) to stay soft.
Cassava cake is a delicious and easy-to-make Filipino dessert. It stays soft, moist, and flavorful even the next day. Whether you prefer it warm or chilled, it’s always a treat. Try this simple recipe and enjoy a slice of Filipino tradition!


